Thursday, January 26, 2012

Cookbook Collector

I love perusing cookbooks for new ideas. However, I usually only find one or two recipes per book that appeal to me so last year I began making photocopies of the recipes I want to try and organized them in a now bursting-at-the-seams 2-inch binder. One of my resolutions for 2012 is to try at least fifty of those recipes this year. 
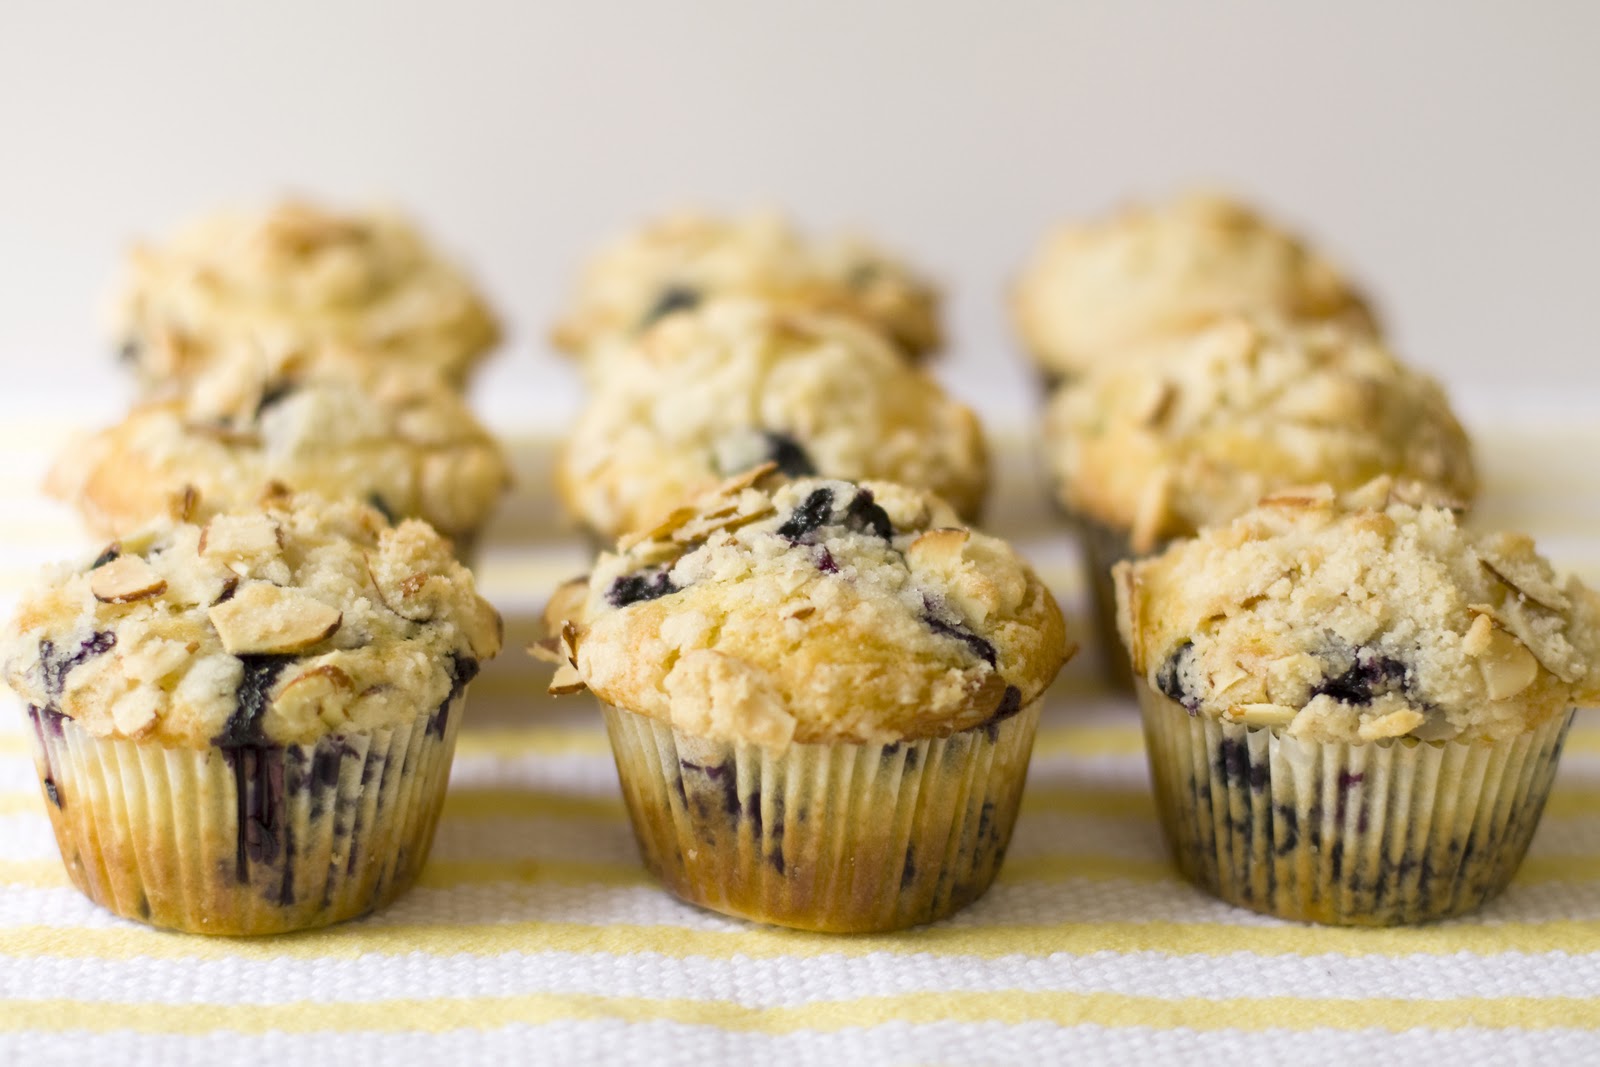
So far I’ve had nearly as many hits as misses, but I did discover a new favorite, Williams-Sonoma’s Blueberry Muffins with Almond Streusel. The buttermilk in the recipe keeps the muffins moist and the almond extract was a nice, unexpected touch. 
2 cups all-purpose flour
2/3 cup sugar
1/2 teaspoon baking powder
1/2 teaspoon baking soda
1/4 teaspoon fine sea salt
1 cup buttermilk
2 large eggs
5 tablespoons unsalted butter, melted and cooled
1/2 teaspoon pure vanilla extract
1/4 teaspoon almond extract (optional)
1 1/2 cups fresh or frozen blueberries
Almond Streusel
1/4 cup all-purpose flour
2 tablespoons sugar
2 tablespoons unsalted butter, at room temperature
1/3 cup sliced almonds
Preheat the oven to 400 degrees. Butter and flour 12 standard muffin cups or line them with paper liners. Butter the top of pan.
2. In a bowl, sift together the flour, sugar, baking powder, baking soda, and salt. In another bowl, whisk together the buttermilk, eggs, melted butter, vanilla, and almond extract, if using. Pour the buttermilk mixture over the flour mixture and stir together until just combined. Fold in the blueberries. Divide the batter evenly among the muffin cups.
3. To make the streusel, in a small bowl, combine the flour, sugar, and butter. Using your fingers, work the ingredients together until just combined. Work in the almonds. Press together into a ball, and then separate with your fingers into coarse crumbs. Sprinkle the almond streusel evenly over the tops of the muffins.
4. Bake until the muffins are golden brown and a toothpick inserted into the center of the muffin comes out almost clean, 20-25 minutes. (If you’re using frozen blueberries, you may need to increase the baking time by a few minutes to compensate for the colder batter.) Transfer to a wire rack and let cool in the pan for 15 minutes, them turn out onto the rack. 

Wednesday, January 18, 2012

Heathy Resolutions

If you made a New Year's resolution to eat healthier, homemade cranberry and almond granola served over yogurt and fresh blueberries is a delicious and antioxidant-filled way to start your day. 
It’s so easy to make I usually bake small batches (about 1/2 pound) so I can have fresh granola but the recipe may easily be doubled for a larger batch. Feel free to experiment with your favorite combinations of dried fruit and nuts. If you prefer a sweeter granola, you may use pure maple syrup, preferably Grade B, instead of honey.

1 cup old-fashioned oats
3/4 teaspoon cinnamon
1/2 cup raw sliced almonds
Pinch nutmeg
Pinch salt
2 tablespoons butter 
1/8 cup brown sugar
1/8 cup honey
1/4 teaspoon pure vanilla extract
1/4 cup raw desiccated coconut 
1/2 cup dried cranberries

Preheat oven to 350 degrees.
In a large bowl, mix oats, cinnamon, nuts, nutmeg, salt; pour into a 8x8-inch Pyrex dish and set aside.
In  small saucepan, melt the butter with brown sugar and honey. Remove from heat and stir in the vanilla; pour over the oats and use a spoon to thoroughly coat oat mixture. 
Bake for 17 minutes. Stir in the coconut, being sure to move the granola from the edges of the pan to the center, and bake for another 5 minutes. Remove from heat and stir again before baking for an additional 5 minutes. 
Remove from the oven and let cool completely in the pan. Stir in the dried fruit. The granola can be stored at room temperature in an airtight container for up to one month. 


Thursday, January 12, 2012

Wishful Thinking


All of this beautiful weather has me wishing for Summer to arrive. While I must wait patiently for several more months, I did indulge my craving for peaches this morning. I love the flavors of sweet peach, almond, and brown sugar with my morning coffee.

Buttermilk Peach Coffee Cake
Adapted from Tish Boyle’s recipe
Crumb Topping and Filling
1 cup flour
1/2 cup firmly packed dark brown sugar
1 teaspoon cinnamon
1/2 cup rolled oats or raw sliced almonds
7 tablespoons unsalted butter, melted
Buttermilk Peach Cake
2 cups flour
1/2 teaspoon baking powder
1/2 teaspoon baking soda
1/4 teaspoon salt
3/4 cups (1 1/2 sticks) unsalted butter, softened
1 1/4 cups granulated sugar
2 large eggs
1 large egg yolk
1 teaspoon vanilla extract
1/4 teaspoon almond extract
3/4 cup buttermilk
1 heaping cup 1/4-inch-thick fresh or frozen peach slices
Make the Topping and Filling
1. In a medium bowl, stir together the flour, sugar, cinnamon, and oats until well blended. Add the melted butter and mix with fork, stirring until the butter is absorbed and the dry ingredients are uniformly moistened. Set aside.

2. Position a rack in the center of the oven and preheat to 350 degrees. Grease the bottom and sides of a 9-inch springform pan and dust with flour.
Make the Cake
1. In a medium bowl, whisk together the flour, baking powder, baking soda, and salt until well blended; set aside.

2. In the bowl of an electric mixer fitted with a paddle attachment, beat together the butter and sugar at medium speed until light and fluffy, about 4 minutes. Beat in the eggs and egg yolk one at a time, beating well after each addition and scraping down the sides of bowl as necessary. Beat in the vanilla and almond extract. Reduce the speed to low and beat in the flour mixture in three additions, alternating it with the buttermilk in two additions.

3. Pour half the batter into the prepared pan and smooth the top with a small offset spatula. Sprinkle half of the crumb topping evenly over batter, breaking up any large clumps with your fingers.

4. Arrange a circle of peach slices, overlapping them slightly, around the outer edge of the pan. Arrange another circle of remaining slices in the center. Spoon the remaining batter onto the filling and smooth it into an even layer. Sprinkle the remaining crumb mixture on top of cake.

5. Bake the cake for 55-65 minutes, until a toothpick inserted into the center comes out clean (do not worry if the top of cake looks a bit wet). You may cover the cake around the 45 minute mark if the top is browning too quickly.

6. Remove the pan from oven and cool on a wire rack for 20 minutes. Remove the sides of pan and cool the cake completely. 

Friday, January 6, 2012

A San Francisco Treat

One of my favorite places in San Francisco is the Ferry Building so I’m ashamed to admit that I didn’t try Miette’s sweets until last year when a friend shared a bag of lavender shortbread cookies on the train ride home from a Giants game.
This Christmas a friend gave me dried lavender to bake with, which got me reminiscing, so I picked up a copy of Miette’s cookbook from the Woodside library (one of my favorite places in the Peninsula) and got to baking. These cookies are crisp and buttery with just a hint of lavender but beware, once you start eating them it’s hard to stop.
A couple of tips about this recipe-first, do not roll the dough too thin or the cookies will spread too much and, second, if you roll the dough between wax paper instead of on a floured surface you can refrigerate and re-roll the dough scraps one time with no problem. 
Finally, Miette suggests freezing the dough to help maintain the shape while cooking. Or you can be OCD like me and upon removing the cookies from the oven, immediately transfer them to a cutting board and use a sharp knife to trim the edges before putting the cookies on a rack to cool. Better yet, be like anybody besides me and forget about what the edges look like and just enjoy eating the cookies! 
Lavender Shortbread Cookies
Adapted from Miette’s Lemon Shortbread recipe
2/3 cup sugar, plus more for sprinkling 
1 1/2 teaspoons dried lavender
2 cups all-purpose flour
1 cup cold unsalted butter, cubed
1/2 teaspoon kosher salt
1/4 teaspoon baking soda
6 tablespoons heavy cream
1 teaspoon vanilla extract
In a small bowl, mix the sugar and lavender; set aside.
In the bowl of a stand mixer fitted with a paddle attachment, combine the flour, butter, salt, and baking soda and beat on low speed until it resembles corn meal. Add the lavender sugar, cream, and vanilla and beat until just clumped together.
Form the dough into a ball and wrap tightly with plastic wrap and refrigerate for 30 minutes. Roll out the dough 1/2 inch thick on a lightly floured surface (or between wax paper) into a 6-by-4-inch rectangle. Using a ruler, square the edges as much as possible. Using a sharp knife, cut the dough into 1-inch squares. Place them 2 inches apart on a parchment lined sheet. Sprinkle lightly with sugar.
Preheat the oven to 350 degrees. Bake the cookies until they are golden brown, 11-13 minutes. Remove to a wire rack to cool. Store in an airtight container for up to 2 weeks.


Thursday, December 29, 2011

A LBD for New Year's Eve

I may not have found a dress for NYE yet but I did find the dessert equivalent of the perfect “LBD”. It is rich and decadent, doesn’t require much effort to make, and you can accessorize it a myriad of ways. I made mine with vanilla extract and plain whipped cream but you can use swap out the vanilla extract in the cake for espresso powder or orange zest (and replace the vanilla in your whipped cream with Kahlua or Grand Marnier). 
The “Little Black Dress” Chocolate Cake
Adapted from Rozanne Gold’s recipe
10 tablespoons unsalted butter
5 large eggs
16 ounces Scharffen Berger semisweet chocolate, chopped
1 teaspoon vanilla extract
Preheat oven to 375 degrees. Line the bottom of a 9-inch springform pan with parchment paper and generously butter sides of pan. 
Using a stand mixer, beat eggs and pinch of salt on medium-high speed for 8 minutes. Melt the chocolate and butter slowly over low heat in a medium saucepan; stir until smooth. Using a flexible rubber spatula, fold the chocolate mixture into the egg mixture until completely incorporated. Add the vanilla. Pour into prepared pan. Bake 16-18 minutes (you want to remove the cake from the oven when the center is still soft). Cool on a rack for 30 minutes.  


Thursday, December 22, 2011

My Not-So-Secret Mission

When it comes to food, I'm spoiled. I blame all the wonderful meals I've had at the various restaurants I've worked at. I've been indoctrinated to believe great food must be made from scratch. My family, however, does not share my passion for cooking and can’t understand why I don’t eat my green bean casserole or Stove Top stuffing at Christmas dinner.
I’ve made it my (now not-so-secret) mission to turn my family into foodies. This is the first year of my endeavor so I’m starting off slowly by replacing the canned cranberry sauce this with a simple, easy to make Port cranberry sauce. I like to make this the day before I plan on serving it because it thickens up in the refrigerator.   
Port Cranberry Sauce
3/4 cup ruby Port (I use Dow’s Ruby Port)
2 cinnamon sticks
1 12-ounce bag fresh cranberries
1/3 cup water* (see note)
1/2 cup sugar
Bring the Port, water, sugar, and cinnamon sticks to a boil in a medium saucepan; stir to dissolve sugar. Reduce heat to medium-low and add cranberries, stirring often until cranberry sauce thickens and berries break, about 15 minutes. Reduce heat to low and let simmer for about 12 minutes. Discard cinnamon sticks and transfer sauce to bowl to cool. 
*If I have oranges I use the juice from one orange in lieu of the water.

Sunday, December 18, 2011

'Tis the Season for Cookies

Every year, some friends and I kick off the holiday season with a trip to Napa to go wine tasting and do a little Christmas shopping in downtown St. Helena. Thankfully, the Trinchero family is generous enough to put us up at the Sutter Home Inn and one of the highlights of our trip is sitting by their Christmas tree, drinking tea, and eating their inn keeper’s gingersnaps before bed.
I’m not usually a fan of crisp cookies but I love these; they are crisp on the edges with a slightly chewy center. They actually get chewier on the second day and have just enough ginger and spice without being overwhelming. (Pat, the inn keeper, uses light molasses but I used dark because I haven’t been able to find an organic light molasses but they taste great either way.) If you like a little extra ginger flavor, add 1/4 cup of crystalized ginger chips.
Pat’s Gingersnaps
2 cups sugar
1 1/2 cup vegetable oil
2 eggs
1/2 cup molasses
4 cups all-purpose flour
1 tablespoon baking soda
1 tablespoon ground ginger
2 teaspoons cinnamon
1 tablespoon salt
Turbinado sugar to sprinkle
Preheat oven to 350 degrees. Line two baking sheets with parchment paper and set aside.
In a large bowl, combine sugar, oil, and molasses and mix well. Add eggs one at a time, beating well after each addition. Add dry ingredients and mix well.
Shape into 1 inch balls (I used a medium cookie scoop), place onto the prepared baking sheets, two inches apart, and sprinkle with turbinado sugar.
Bake for 10-12 minutes and transfer to rack to cool.