Sunday, June 3, 2012

Oh, Martha


When I began my blog I promised myself I would only post recipes that I would want to make over and over again. However, I can’t help but feel badly when I have weeks, like this past one, where I’ve baked up a storm and, while there were a few recipes that were good, nothing was outstanding.
So, after several mediocre scone recipes and one failed attempt making lemon curd, I was happy to find some organic raspberries at Costco (not usually a place I buy fruit but these berries were beautiful) to use to test out a cobbler recipe I recently saw in a magazine. The recipe is easy to make and the cobbler is absolutely irresistible.
Raspberry Cobbler
From Martha Stewart’s magazine, May 2012
Filling
5 cups (1 pound 10 ounces) raspberries
3/4 cup sugar
2 tablespoons cornstarch
1/4 teaspoon coarse salt
Biscuit Topping
1 3/4 cups all-purpose flour
1/4 cup sugar
1/4 teaspoon salt
6 tablespoons cold unsalted butter
3/4 cup heavy cream, plus more for brushing
Sanding sugar, for sprinkling
1. Preheat the oven to 375 degrees.

2. Filling: Mix together the raspberries, sugar, cornstarch, and salt. Pour into a 9-inch square baking dish (2 inches deep).

3. Biscuit Topping: Whisk together flour, baking powder, sugar, and salt. Cut in butter until largest pieces are pea sized. Add cream; use a fork to incorporate, stirring just until cream is absorbed (there will be lots of loose pieces).

4. Turn out dough onto a clean surface and knead a couple of times, gathering loose bits into a ball. Pat dough into 1 1/4 inch thickness. Cut into 9 squares and place them on top of filling. Brush with cream and sprinkle with sanding sugar.

5. Bake cobbler until bubbling in the center and biscuit top is golden brown, about 1 hour. Let stand at least 30 minutes before serving. 


Wednesday, May 16, 2012

Mmm, Malt


It’s nice to have a lazy day when the biggest decision I have to make is what to bake. As you may know, I have an addiction to malted milk desserts and the large box of Whoppers on my kitchen counter was too tempting to resist experimenting with! These malted milk blondies aren’t too sweet, and have crisp edges with soft, moist centers.  


Malted Milk Blondies
1 cup all-purpose flour
1 teaspoon baking powder
2 tablespoons malted milk powder (I use Carnation brand) 
1/4 teaspoon salt
8 tablespoons (1 stick) unsalted butter
2/3 cup brown sugar
1 teaspoon pure vanilla extract 
1 large egg 
2/3 cup Whoppers, chopped
1/2 cup semi-sweet chocolate chips
1. Preheat oven to 350 degrees and position rack in the center of oven. Line an 8-inch square pan with foil, covering bottom and all four sides; set aside.
2. Sift flour, baking powder, malted milk, and salt into a medium bowl and set aside.
3. Melt butter in a small saucepan. Remove from heat and stir in brown sugar, vanilla, and egg. 
4. Add the butter mixture to the flour mixture and mix until just combined. Stir in chopped Whoppers and chocolate chips. Spread in pan.
5. Bake for about 25 minutes, or until top is golden brown and the edges have pulled away from sides of pan. Cool blondies in the pan on a wire rack. Lift foil and transfer to cutting board to cut into squares.
Store in an airtight container at room temperature for up to 4 days.  

Wednesday, May 9, 2012

Melt In Your Mouth


Sometimes my best recipes result out of the necessity to clean out my ever-overflowing pantry and a second wind before bedtime. Thanks to a late night baking experiment last week, I may have created my favorite chocolate cookie recipe yet.
These mocha cookies are dense in flavor like a brownie but have a light, airy texture, similar a meringue cookie. I’d recommend using a very high quality chocolate for these cookies (I prefer Scharffen Berger).
Mocha Meltaways
Yield: About 24 cookies
1/4 cup (1/2 stick) unsalted butter
3 ounces unsweetened chocolate
10 ounces semi-sweet chocolate 
1/2 cup cake flour
1 teaspoon baking powder
1/4 teaspoon salt 
1 teaspoon espresso powder
1 tablespoon water
1 teaspoon pure vanilla extract
4 eggs
1 1/4 cup sugar

1. In the top of a double boiler, melt the butter and chocolate, stirring occasionally. Remove from heat when the mixture is fully melted and well combined.
2. In a medium bowl, sift together the cake flour , baking powder, and salt; set aside. In a small bowl, mix the espresso powder and water and set aside.
3. In a stand mixer fitted with a wire whip attachment, beat the eggs, sugar, and coffee mixture until fluffy, about 6 minutes. Reduce the speed to medium and add the chocolate mixture; blend until fully incorporated, about 2 minutes. Reduce the speed to low and add the flour mixture until just incorporated, about 1 minute. (The dough will look about the consistency of brownie batter.)
4. Cover the mixing bowl with plastic wrap and refrigerate overnight.  
5. Preheat the oven to 350 degrees. Prepare two baking sheets with parchment paper and use a medium sized cookie scoop to scoop the dough. Bake cookies, one sheet at a time, on the middle rack of your oven for 13-15 minutes. Be careful not to overcook the cookies as they go from a gooey center to having a burnt bottom fairly quickly. Let cool on sheet for a couple of minutes before transferring to wire rack to cool. 


Saturday, April 28, 2012

Back to Baking


I knew it was time to take a vacation when I no longer felt inspired to bake. So, after a relaxing week in the Southwest, I’m excited to get back into baking!
Several years ago I told a chef, John Bentley, that I was having a hard time finding the perfect carrot cake recipe. I wanted something simple, not too sweet, and sans raisins or coconut. He immediately grabbed a piece of scratch paper and wrote down the following cake and frosting recipes and, if you’ve ever been to his restaurant, it’s no surprise this cake is delicious. 

Carrot Cake
4 eggs
3/4 cup vegetable oil
1/2 teaspoon salt
1 3/4 cup sugar
1 1/8 cup flour
1 1/2 tablespoons cinnamon
3/4 teaspoon baking soda
1/4 teaspoon baking powder
1 lb. peeled, grated carrots
1/3 cup chopped walnuts
Whip eggs, add oil slowly, add sugar and salt. Sift flour, cinnamon, baking powder and soda, add slowly. Fold in carrots and walnuts. Pour into buttered and floured 9” cake pan (I line my pan with parchment paper prior to buttering/flouring pan). Bake at 375 degrees for 50-55 minutes; let cool.
Cream Cheese Frosting
(Enough for a single layer 9-inch cake)
8 oz. cream cheese, room temperature
1/4 cup unsalted butter
2 teaspoons vanilla extract
2 cups powdered sugar
Use electric mixer to beat all the ingredients in a medium bowl until smooth and creamy.

Thursday, April 12, 2012

Confessions of a Chocoholic

While I try to be an equal opportunity baker, I must confess that my ideal late night indulgence includes some combination of chocolate and coffee and my favorite brownies hit the spot every time.

These brownies are rich and decadent, with a fudgy interior and a cake-like crust. When I really want to be decadent, I brush the top of the brownie with a little bit of Kahlua and top with (my favorite) Starbucks Java Chip ice cream.
Best of all, these brownies are easy to make-you can mix all of the ingredients by hand in the top of a double boiler.
Decadent Brownies
1/2 cup (1 stick) unsalted butter, cut into large pieces
6 ounces bittersweet chocolate, chopped
1 1/3 cup sugar
3 large eggs
3 tablespoons unsweetened cocoa powder
1 teaspoon pure vanilla extract
1 teaspoon instant espresso powder
1/4 teaspoon salt
1/3 cup toasted walnuts
3/4 cups all-purpose flour, unsifted
1. Preheat the oven to 350 degrees. Line an 8-inch square baking pan with parchment paper, leaving a slight overhang on all side.
2. Melt the butter and chocolate in a double boiler, stirring until smooth. Remove from heat and stir in sugar. Stir in the eggs, one at a time, then add the cocoa powder, vanilla extract, espresso powder, salt, and walnuts. Fold in the flour until well combined.
3. Pour the batter into the prepared pan. Bake until a toothpick inserted into the center comes out with a few crumbs, about 35 minutes. Let cool slightly in pan for about 10 minutes. Lift brownies from pan using parchment paper and transfer to wire rack to cool completely before cutting. Brownies can be stored at room temperature in an airtight container for up to three days.


Thursday, March 29, 2012

Ooey Gooey

I haven’t intentionally been neglecting my beloved blog all week. In fact, my lack of posting this past week hasn’t been for lack of baking. I’e been working on whittling down my collection of cake recipes and I didn’t want to post a recipe I wasn’t crazy about. I was just about to throw in my oven mitts when a friend and co-worked lent me the latest issues of Saveur magazine, the cover of which was adorned by a picture of a beautiful cake and several cake recipes inside that I could not wait to try. 
I started off with their recipe for a caramel cake and fell in love. The caramel frosting does take about 45 minutes to prepare but it is oewey, goewey, and delicious. The cake itself is a little more coarse than other white cake recipes I’ve tried but it is a perfect pairing with the frosting. 
I adapted the recipe slightly, but I would highly recommend picking up a copy of the magazine so you may try the other cake recipes also featured. 
The magazine says the cake serves 10-12 but myself and two friends managed to eat half the cake in one sitting.


Caramel Cake
Adapted from Saveur Magazine, Issue #145
For the Cake
2 stick (16 tablespoons) unsalted butter, plus more for pans
3 cups cake flour, sifted
2 1/2 teaspoons baking powder
1 teaspoon fine salt
1 cup whole milk
2 teaspoons pure vanilla extract
1 1/2 cups granulated sugar
4 large eggs, room temperature
For the Frosting
3 1/2 cups granulated sugar
12 tablespoons unsalted butter, melted
30 oz. (2 1/2 cans) evaporated milk
1 large egg, room temperature
2 teaspoons pure vanilla extract
1 teaspoon baking powder
Make the Cake
1. Heat oven to 350 degrees. Butter and flour three 8” cake pans; set aside. 
2. Whisk together flour, baking powder, and salt in a medium bowl; set aside.
In a small bowl, mix the milk and vanilla extract and set aside. 
4. In the bowl of a standing mixer fitted with a paddle attachment, cream butter and sugar on medium speed until fluffy, about 3 minutes.
5. Add eggs, one at a time, beating well after each addition. Reduce speed to low and alternatively add dry ingredients in 3 batches and wet ingredients in 2 batches. Increase speed to high and beat until batter is smooth, about 10 seconds.

6. Divide the batter among prepared pans, smooth top with offset spatula, and drop the pan onto your countertop to burst any large air bubbles.

7. Bake cakes about 25 minutes, or until a toothpick inserted into the center comes out clean. I recommend rotating the pans halfway through.

8. Let cakes cool for about 15 minutes in pans; invert onto wire racks and let cool completely before frosting.

Make the Frosting
1.  Whisk together 3 cups sugar, butter, evaporated milk, and egg in 6-quart saucepan or Dutch oven; set aside.

2. Heat remaining sugar in a small skillet over high heat, swirling often, until sugar melts and turns an amber color. Immediately pour caramel into milk mixture and bring to a boil over medium-high heat. Attach a candy thermometer to side of pan and cook, constantly stirring with a wooden spoon, until thermometer reached 232 degrees, about 45 minutes. Remove from heat and immediately stir in vanilla and baking soda; let sit 1 minute.

3. Using a handheld mixer, beat caramel mixture on medium-low speed until the consistency of loose pudding, about 1 minute. Immediately place one cake on a cake stand and pour over 1/2 cup caramel icing; top with second layer and pour over 1/2 cup icing. Top with third cake layer and pour remaining icing around the top edge of cake and then over the center. Quickly spread icing over sides of cake; let icing cool completely before serving. Store at room temperature for up to three days. 

Thursday, March 15, 2012

Happy St. Patty's Day

I love that pretty much all holidays are an excuse to bake, including St. Patrick’s Day. Since I just made some Guinness chocolate sauce (which, by the way, makes the best hot chocolate ever), I decided to use bake something sweet with Baileys this week. While I opted for vanilla cupcakes, the Baileys frosting would be a great filling with a chocolate cake topped with chocolate ganache, too.

Just for fun, I used a tip I found on my newest addiction, Pinterest, and only filled the cupcake liners 2/3 full (instead of the usual 3/4 full) and preheated the oven to 350 degrees then lowered the oven to 325 degrees just before putting the cupcakes in the oven. As promised, the cupcakes did bake up higher than they usually do (I didn’t put much frosting on the cupcakes so they did rise pretty high). 


Vanilla Cupcakes 
Yield: About 15 cupcakes (12 if you fill the liners 3/4 full)
1/2 cup (1 stick) unsalted butter, softened
1 1/2 cup sugar
2 large eggs
1/2 cup milk, at room temperature
1/2 vanilla bean, seeds scraped out
1 cup self-rising flour
3/4 cups all-purpose flour
Preheat oven to 350 degrees and line muffin pan(s) with paper liners; set aside.
Scrape the seeds out of 1/2 vanilla bean into the milk and set aside.
In the bowl of a stand mixer fitted with a paddle attachment, beat the butter and sugar on medium speed until smooth, about 3 minutes. Add the eggs one at a time, mixing well after each addition.
In a medium bowl, sift the two flours together.
At low speed, beat in the flour mixture in three additions, alternating with milk in two additions.
Fill the cupcake liners 2/3 full and reduce the oven temperature to 325 degrees. Bake for about 22 minutes, or until a tester inserted into the center comes out clean.
Remove from oven and let stand in pan for about 10 minutes before removing cupcakes and placing them on rack to cool completely before frosting.
Baileys Buttercream Frosting
1/2 cup (1 stick) unsalted butter, at room temperature
3 1/4 cup confectioner’s sugar, sifted
1/4 cup Baileys
1 tablespoon milk
In the bowl of a standing mixer fitted with a paddle attachment, cream the butter on medium speed until fluffy, about 3 minutes. Reduce speed to low and slowly add the confectioner’s sugar until incorporated with butter. Add Baileys and milk and beat on medium speed until well mixed, about 3 minutes. Increase speed to high and beat for about 1 minute to aerate.

Thursday, March 8, 2012

Easy Ways to Recycle

I thought I'd pass along a few really easy ways to recycle:
1. Save your butter wrappers in a freezer bag for the next time you need to grease a cake pan;
2. Use your empty glass spice to hold buttons, toothpicks, safety pins; and
3. Don't throw away empty vanilla bean pods! Put the pods with some sugar in a small glass container and let after a few days you can use the yummy vanilla sugar in your coffee!
Happy baking :)

Thursday, March 1, 2012

Waffles Make Me Happy

Buying a Belgian waffle maker was either the best or worst decision of my life, depending on whether I can run enough to avoid an expanding waistline should my twice-a-week waffle fix continues.
I like my waffles crispy on the outside with a soft center and this recipe, adapted from a page I ripped out of a Gourmet magazine from a few years ago, does the trick. Topped with butter, powdered sugar, and fresh blueberries, these waffles actually make me look forward to getting out of my warm bed on a cold morning! 

Crispy Waffles
Yield: 4 Waffles
1 3/4 cups all purpose flour
2 tablespoons sugar
1 1/2 teaspoons baking powder
1/2 teaspoon salt
1 3/4 cups milk (whole or 2%)
2 large eggs
6 tablespoons (3/4 stick) unsalted butter, melted, slightly cooled
Vegetable oil
Powdered sugar
Fresh berries
Whisk flour, sugar, baking powder, and 1/2 teaspoon salt in large bowl to blend. Whisk milk, 2 large eggs, and melted butter in medium bowl to blend. Add milk mixture to dry ingredients in large bowl and whisk until batter is smooth. Let batter stand at room temperature for about 20 minutes.
Heat waffle iron according to medium-high heat (I use setting number 4 on my waffle iron). Brush grids lightly with vegetable oil. Pour enough batter onto each waffle grid to cover generously. Close waffle iron and cook until waffles are golden brown and crisp on both sides, about 5 minutes or until steam subsides.
Dust with powdered sugar and top with plenty of fresh berries. 

Wednesday, February 22, 2012

Glory Days

Back in my college, my good friend Emme and I used to have a Monday morning tradition: coffee and coffee cake from Starbucks.
I have to admit, over the years I’ve had a hard time finding a recipe for coffee cake that was as good as Starbucks’. The were often too dry or too sweet. I had just about given up hope until last night I made a blueberry crumb cake. This is my new go-to coffee cake recipe-it’s incredibly moist with just the right amount of crumb topping. And while Emme now lives 2,00 miles away, I still smile and think of her every time I have coffee cake for breakfast. 
Blueberry Crumb Cake
Adapted from Tish Boyle’s Sour-Cream Blueberry Crumb Cake
Crumb Topping
1 cup all-purpose flour
1/4 cup granulated sugar
1/3 cup firmly packed dark brown sugar
1 teaspoon ground cinnamon
1/8 teaspoon salt
7 tablespoons unsalted butter, melted
Blueberry Cake
1 1/2 cups all-purpose flour
1 1/4 teaspoon baking powder
1 1/4 teaspoon baking soda
1/4 teaspoon salt
1 cup fresh blueberries
1 cup plain yogurt
1 1/2 teaspoons vanilla extract
8 tablespoons (1 stick) unsalted butter, softened
1 cup granulated sugar
2 large eggs
Make the Topping
1. In a medium bowl, stir the flour, sugar, brown sugar, cinnamon, and salt until well blended. Add the melted butter to the mix, stirring until the butter is absorbed and the dry ingredients are uniformly moistened. Set aside.

Make the Cake
1. Position a rack in the center of the oven and preheat the oven to 350 degrees. Butter and flour the bottom and sides of a 9-inch square baking pan.
2. In another medium bowl, whisk together the flour, baking powder, baking soda, and salt until well blended.
3. In a small bowl, toss the blueberries with 1 tablespoon of the flour mixture until the berries are coated; set aside. In another small bowl, whisk together the yogurt and vanilla and set aside.

4. In the bowl of a standing mixer fitted with a paddle attachment, beat together the butter and granulated sugar at medium speed until fluffy, about 4 minutes. Beat in eggs one at a time, scraping down the sides of the bowl as necessary. At low speed, beat in the flour mixture in three additions, alternating with yogurt in two additions. Using a rubber spatula, fold in the blueberries. Scrape the batter into the prepared pan and smooth top with an offset spatula.

5. Sprinkle the crumb topping evenly over the batter, breaking up any large lumps with your fingers.

6. Bake the cake until a toothpick inserted into the center comes out clean, about 40-45 minutes. Place the cake on a wire rack and let cool completely.

7. Cut the cake and serve from the pan. Store at room temperature, covered with foil, for up to 3 days. 


Thursday, February 16, 2012

Candy Craving

What could be better than a peanut butter cake with chocolate frosting? One that is sprinkled with crushed Butterfinger candy! I made this special cake for my friend’s birthday last week-the sour cream makes the cake moist and not too sweet.
Peanut Butter-Sour Cream Bundt Cake with Butterfinger Ganache Glaze
Adapted from Lauren Chattman's Recipe
For the Cake
1 cup sour cream
3 large eggs
2 teaspoons pure vanilla extract
2 1/4 cups all-purpose flour
1 teaspoon baking powder 
1/2 teaspoon baking soda
1/2 teaspoon salt
1/2 cup (1 stick) unsalted butter, softened
1 cup smooth peanut butter
1 1/2 cups packed brown sugar
For the Glaze
8 ounces semisweet chocolate, finely chopped
1 tablespoon light corn syrup
3/4 cup heavy cream
1 Butterfinger bar, chopped
1. Preheat the oven to 350 degrees. Grease a 12-cup Bundt pan and dust with flour. Whisk together the sour cream, eggs, and vanilla in a medium bowl. Whisk together the flour, baking powder, baking soda, and salt in a large bowl. 
2. Combine the butter, peanut butter, and brown sugar in the mixing bowl of a stand mixer fitted with a paddle attachment. Beat on medium-high until fluffy, about 3 minutes, scraping down the sides of the bowl as necessary.
3. Reduce the speed to low; add 1/3 of the flour mixture and beat until incorporated. Add 1/2 of the sour cream mixture. Repeat, alternating flour and sour cream mixtures ending with the flour mixture, scraping down the sides of bowl between each addition. Turn the mixer to medium-high speed and beat for 1 minute.
4. Scrape the batter into the prepared pan. Bake until a toothpick inserted in the center comes out clean, about 45 minutes. Let the cake cool in the pan for  minutes, then invert it onto a wire rack to cool completely.

5. Place the chocolate and corn syrup in a heatproof bowl. Heat the cream in a small saucepan over medium-high heat until it comes to a boil. Add the chocolate to the cream and let stand for 5 minutes. Whisk until smooth.

6. Pour the warm glaze over the cake, letting it drip down the sides. Sprinkle the chopped Butterfinger bar over the glaze. let stand until gaze is set, about 30 minutes. Slice and serve. Store cake at room temperature in a cake keeper for up to 3 days.


Saturday, February 11, 2012

My Favorite Cupcake

There’s something irresistible about red velvet cupcakes-maybe it’s the cream cheese frosting or the smokey, brick-like color. Either way, what better excuse than Valentine's Day to bake your favorite cupcake?
Red Velvet Cupcakes  
Makes 24 standard sized cupcakes or one 8-inch layer cake
1/4 cup unsweetened cocoa powder
1/4 cup hot water
2 teaspoons red gel food coloring
1 cup (2 sticks) unsalted butter, softened
2 cups sugar 
1 1/4 cups buttermilk
1 1/2 teaspoons vanilla extract
3 cups all-purpose flour
1/2 teaspoon fine salt
2 teaspoons vinegar
2 teaspoons baking soda
3 large eggs
Preheat the oven to 350 degrees. Line two muffin pans (or butter and flour two 8-inch cake pans); set aside.
In a medium bowl, combine the cocoa powder, hot water, and food coloring; set aside to cool.
In a standing mixer fitted with a paddle attachment, beat the butter and sugar on medium speed until light and fluffy, about 4 minutes. Scrape down the bowl and add the eggs one at a time, beating well after each addition.
Stir in the buttermilk and vanilla into the cooled cocoa mixture.
In a large bowl, sift together the flour and salt. With the mixer on medium, add the flour mixture and cocoa mixture to the sugar mixture, beginning and ending with the flour. Be careful not to over-beat the batter.
In a small bowl, use a spoon to combine the vinegar and baking soda, stirring until the baking soda dissolves. Fold into the batter  until just combined.
Use a large cookie scoop and fill each cup 3/4 full. Bake cupcakes for 15-17 minutes, if making a cake bake for 25-30 minutes, or until a toothpick inserted into the center comes out clean. 
Let the cupcakes cool in the pan for 10 minutes before removing to a wire rack to cool completely. 

Thursday, February 9, 2012

May I Have S'more?

Valentine’s Day is a great holiday for crafts. S'mores on a stick was an idea from a wedding favor but I thought it would be a great treat for Valentine's Day. Not only are they cute but they are simple enough you could make them with your kids. I found the lollipop sticks, treat bags, and ribbon all at Michael’s Craft store. 

What you’ll need:
-Lollipop sticks
-Marshmallows
-Crumbled graham crackers
-Milk chocolate pieces (I used E. Guittard wafers)
-Double boiler
-Clear 4x6 treat bags
-Ribbon
-Styrofoam
1. Insert lollipop stick into marshmallows and set aside.
2. Crumbled graham crackers. I put them in a plastic bag and rolled it with a rolling pin.
3. Melt milk chocolate in double boiler. It is easier to work in small batches; you’ll need about 4 ounces for every 8 marshmallows.
4. Holding the marshmallow stick over the double boiler, use a rubber or silicone spatula to coat the marshmallow with chocolate.

5. Roll the marshmallow in graham cracker crumbs.

6. Insert lollipop into a piece of styrofoam and let chocolate set.

7. Put the s’more in the treat bag and tie with a 12-inch long ribbon. 

Monday, February 6, 2012

Guinness Just Got Better

I must have been in the mood for a Guinness as I was flipping through this month’s Better Homes and Garden because the idea of a stout chocolate sauce poured over vanilla bean ice cream was irresistible. Don’t feel bad if you find yourself eating this sauce by the spoonful, I did it too.
If you want to make a somebody’s day, pour half of the sauce into a mason jar, tie a ribbon or twine around it, and give to a friend-instant joy!
Guinness Chocolate Sauce
 Adapted from BHG Easy Fudge Sauce
Yield: 12 servings
1 cup packed brown sugar
1/2 cup unsweetened cocoa powder
1/2 cup unsalted butter
1/2 cup half-and-half
2 teaspoons pure vanilla extract
1/4 cup Guinness 
In a small bowl, mix together brown sugar and cocoa powder; set aside.
2. In a medium saucepan, melt the butter with the half-and-half. Cook and stir over medium high heat until mixture begins to bubble around the outside of pan, about 5 minutes. Reduce heat to low and add the cocoa mixture. Cook, stirring constantly until sugar is dissolved and mixture is smooth and thickened, about 5 minutes. 
3. Remove from heat and stir in the vanilla extract and Guinness. 
Store, covered, in refrigerator up to one week. 

Wednesday, February 1, 2012

Because Game Time is Snack Time

Snacks and the Super Bowl go hand in hand-why not cook up some hot, fresh pretzels for your Super Bowl party? If you have many guests coming over, use a sharp knife to cut the rope of dough into squares for pretzel bites-delicious! 
From start to finish these pretzels take about 2 hours to make and since they are best hot out of the oven so you’ll want to plan your time accordingly.

Homemade Soft Pretzels
From Alton Brown's Food Network recipe
Yield: 8 pretzels
Prep: 30 minutes
Inactive: 1 hour
Cook: 25 minutes
1 1/2 cups warm (110-115 degrees) water
1 tablespoon sugar
2 teaspoons kosher salt
1 package active dry yeast
22 ounces all purpose flour, approximately 4 1/2 cups
2 ounces unsalted butter, melted
Vegetable oil for pan
10 cups water
2/3 cup baking soda
1 large egg yolk beaten with 1 tablespoon water
Pretzel salt 
1. Combine the water, sugar and kosher salt in the bowl of a stand mixer and sprinkle the yeast on top. Allow to sit for 5 minutes or until the mixture begins to foam. Add the flour and butter and, using the dough hook attachment, mix on low speed until well combined.

2. Change to medium speed and knead until the dough is smooth and pulls away from the side of the bowl, approximately 4 to 5 minutes. Remove the dough from the bowl, clean the bowl and then oil it well with vegetable oil. Return the dough to the bowl, cover with plastic wrap and sit in a warm place for approximately 50 to 55 minutes or until the dough has doubled in size.

3. Preheat the oven to 450 degrees F. Line 2 half-sheet pans with parchment paper and lightly brush with the vegetable oil. Set aside.

4. Bring the 10 cups of water and the baking soda to a rolling boil in an 8-quart saucepan or roasting pan.

5. In the meantime, turn the dough out onto a slightly oiled work surface and divide into 8 equal pieces. Roll out each piece of dough into a 24-inch rope. Make a U-shape with the rope, holding the ends of the rope, cross them over each other and press onto the bottom of the U in order to form the shape of a pretzel. Place onto the parchment-lined half sheet pan.

6. Place the pretzels into the boiling water, 1 by 1, for 30 seconds. Remove them from the water using a large flat spatula. Return to the half sheet pan, brush the top of each pretzel with the beaten egg yolk and water mixture and sprinkle with the pretzel salt. Bake until dark golden brown in color, approximately 12 to 14 minutes. 

Thursday, January 26, 2012

Cookbook Collector

I love perusing cookbooks for new ideas. However, I usually only find one or two recipes per book that appeal to me so last year I began making photocopies of the recipes I want to try and organized them in a now bursting-at-the-seams 2-inch binder. One of my resolutions for 2012 is to try at least fifty of those recipes this year. 
So far I’ve had nearly as many hits as misses, but I did discover a new favorite, Williams-Sonoma’s Blueberry Muffins with Almond Streusel. The buttermilk in the recipe keeps the muffins moist and the almond extract was a nice, unexpected touch. 
2 cups all-purpose flour
2/3 cup sugar
1/2 teaspoon baking powder
1/2 teaspoon baking soda
1/4 teaspoon fine sea salt
1 cup buttermilk
2 large eggs
5 tablespoons unsalted butter, melted and cooled
1/2 teaspoon pure vanilla extract
1/4 teaspoon almond extract (optional)
1 1/2 cups fresh or frozen blueberries
Almond Streusel
1/4 cup all-purpose flour
2 tablespoons sugar
2 tablespoons unsalted butter, at room temperature
1/3 cup sliced almonds
Preheat the oven to 400 degrees. Butter and flour 12 standard muffin cups or line them with paper liners. Butter the top of pan.
2. In a bowl, sift together the flour, sugar, baking powder, baking soda, and salt. In another bowl, whisk together the buttermilk, eggs, melted butter, vanilla, and almond extract, if using. Pour the buttermilk mixture over the flour mixture and stir together until just combined. Fold in the blueberries. Divide the batter evenly among the muffin cups.
3. To make the streusel, in a small bowl, combine the flour, sugar, and butter. Using your fingers, work the ingredients together until just combined. Work in the almonds. Press together into a ball, and then separate with your fingers into coarse crumbs. Sprinkle the almond streusel evenly over the tops of the muffins.
4. Bake until the muffins are golden brown and a toothpick inserted into the center of the muffin comes out almost clean, 20-25 minutes. (If you’re using frozen blueberries, you may need to increase the baking time by a few minutes to compensate for the colder batter.) Transfer to a wire rack and let cool in the pan for 15 minutes, them turn out onto the rack. 

Wednesday, January 18, 2012

Heathy Resolutions

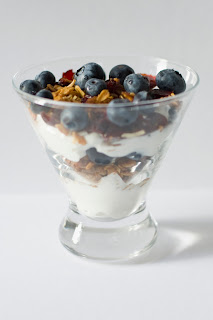
If you made a New Year's resolution to eat healthier, homemade cranberry and almond granola served over yogurt and fresh blueberries is a delicious and antioxidant-filled way to start your day. 
It’s so easy to make I usually bake small batches (about 1/2 pound) so I can have fresh granola but the recipe may easily be doubled for a larger batch. Feel free to experiment with your favorite combinations of dried fruit and nuts. If you prefer a sweeter granola, you may use pure maple syrup, preferably Grade B, instead of honey.

1 cup old-fashioned oats
3/4 teaspoon cinnamon
1/2 cup raw sliced almonds
Pinch nutmeg
Pinch salt
2 tablespoons butter 
1/8 cup brown sugar
1/8 cup honey
1/4 teaspoon pure vanilla extract
1/4 cup raw desiccated coconut 
1/2 cup dried cranberries

Preheat oven to 350 degrees.
In a large bowl, mix oats, cinnamon, nuts, nutmeg, salt; pour into a 8x8-inch Pyrex dish and set aside.
In  small saucepan, melt the butter with brown sugar and honey. Remove from heat and stir in the vanilla; pour over the oats and use a spoon to thoroughly coat oat mixture. 
Bake for 17 minutes. Stir in the coconut, being sure to move the granola from the edges of the pan to the center, and bake for another 5 minutes. Remove from heat and stir again before baking for an additional 5 minutes. 
Remove from the oven and let cool completely in the pan. Stir in the dried fruit. The granola can be stored at room temperature in an airtight container for up to one month.